

Install a Logic Controls USB Pole Display in Cash Register Express
These instructions will give you step by step instructions on how to set up your pole display using Windows XP. You must have administrator access in Windows XP to install new hardware 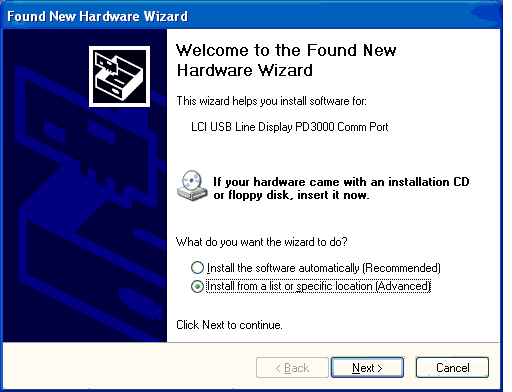
USB / Virtual COM Port driver Installation:
1. Plug the Pole Display's USB cable into your computer.
2. Windows will automatically detect that new hardware has been plugged into the computer.
3. Choose to install from a list or specific location, then click Next.
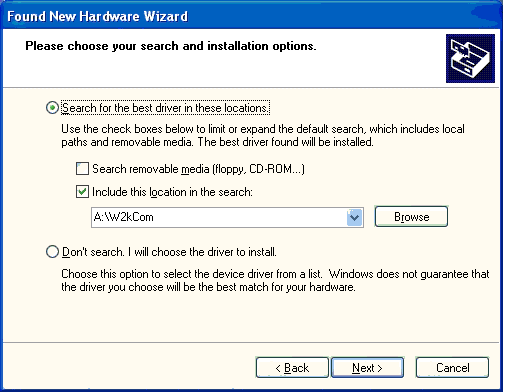
4. Insert the driver disk that came with your pole display and click on Search for the Best Driver. There are 2 folders on the floppy, so make sure you either browse or type in the path to the W2kCom (Virtual Com Port Driver) folder on the A:\ drive. Then click Next.
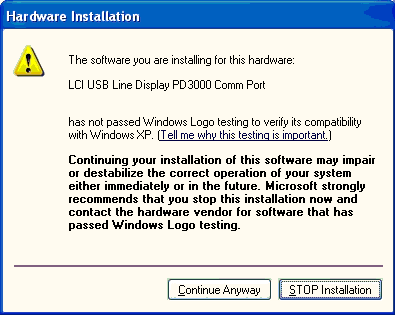
5. Click Continue Anyway, and the installation will complete automatically.
6. After the installation is complete, right-click the mouse on the My Computer icon either on your desktop or in your Start menu, then right-click on Properties.
7. Click on the Hardware tab at the top of the next window, then click on Device Manager.
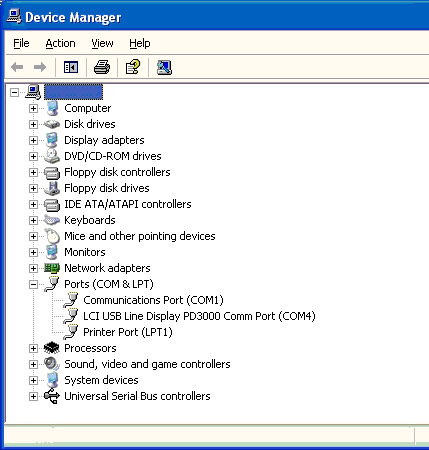
8. Click on the Plus symbol next to where it says Ports and look for the LCI USB Line Display PD3000 Comm Port or similar entry in the list. Take note of what Com Port it says there. In this example, COM4 is selected.
9. Click the X in the upper right-hand corner of the window to close the Device Manager. 10. Start the Cash Register Express or Restaurant Pro Express program. 11. From the Login screen, click on File, then Setup Screen and type in the Administrator password.
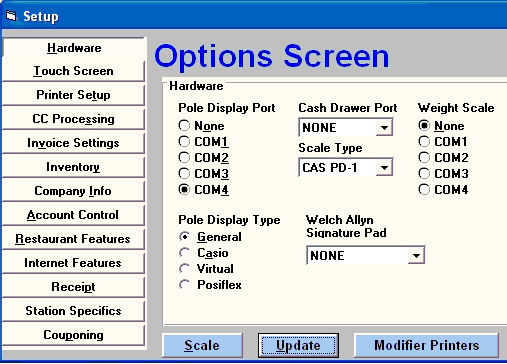
12. On the Hardware Screen, click on the COM port that the USB Line Display was set to in the Device Manager, then click Update at the bottom of the screen to save your changes.
13. Now login to CRE/RPE and enter an item onto the Invoice and check the Pole Display, it should show the item you just rang up.
Your USB Pole Display is now setup and ready to be used.
Return to the POS library.
Contact Us for the Best Deals Anywhere: 1-866-468-5767
